
Table of Contents
- Why Avoiding Common Garage Installation Mistakes Starts Before the First Bolt
- What You’ll Need Before Installation Begins
- Step 1: Measure the Opening and Verify the Rough Opening
- Step 2: Align Tracks, Rollers, and Mounting Brackets Correctly
- Step 3: Anchor the Door and Verify Structural Support
- Step 4: Wire the Opener and Test Safety Sensors
- Step 5: Balance Torsion Springs and Counterbalance the Door
- Signs of Improper Garage Door Installation to Watch For
- Post-Installation Maintenance Schedule
- DIY vs. Professional Threshold
- Frequently Asked Questions
Last Updated: September 20, 2026
Why Avoiding Common Garage Installation Mistakes Starts Before the First Bolt
Most garage door failures trace back to day one, not year ten. Avoiding common garage installation mistakes comes down to one idea: the door is a system, and every part must line up with every other part. Get that wrong and you get a door that groans, binds, or quits halfway down.
A garage door is a balanced mechanical system, not a panel you hang on a wall. Treat every measurement, anchor, and spring as part of one machine and most failures never happen.
What You’ll Need Before Installation Begins
Good installs start with the right tools on hand.
Total Time: 4-8 hours for a standard door, longer for custom work.
Difficulty: Intermediate to advanced. Torsion springs are not a beginner job.
Tools and Materials Checklist
- Tape measure (25 ft minimum)
- 4 ft and 2 ft levels
- Drill with driver bits
- Socket and wrench set
- Lag screws and anchors rated for your framing
- Winding bars for torsion springs
- Ladder rated for the ceiling height
- Manufacturer installation manual
- Safety glasses and gloves
Never remove the winding bars from a torsion spring until the set screws are fully tightened. A slipped bar can spin free with enough force to break a wrist.
Step 1: Measure the Opening and Verify the Rough Opening
Measure twice, install once. A rough opening that is out of square by even a small amount will cause the door to bind for its entire life.
Common Sizing and Measurement Errors
- Measuring only once and trusting the number
- Ignoring a floor that slopes from side to side
- Forgetting to account for the door’s track and hardware
- Ordering before checking that the header is level
A common mistake is measuring the old door instead of the opening. Old doors sag over time. The opening is the number that matters.
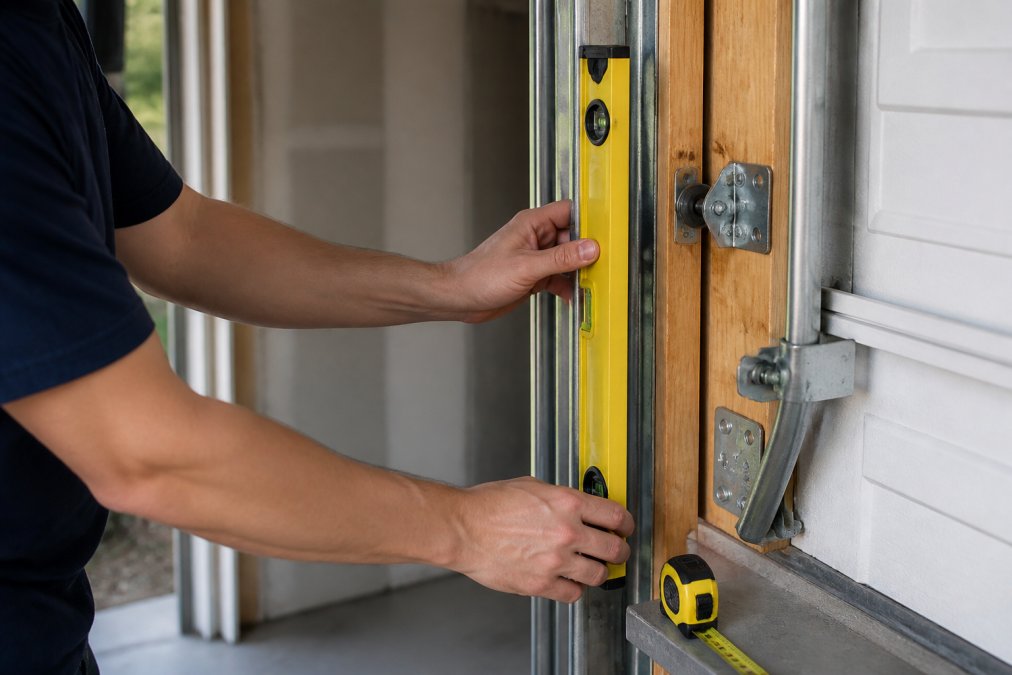
Step 2: Align Tracks, Rollers, and Mounting Brackets Correctly
Tracks must be plumb, level, and parallel. Otherwise the rollers drag and the door fights you every time it moves.
Step 3: Anchor the Door and Verify Structural Support
Anchoring is where the door’s weight meets your building. Get it wrong and the whole system shifts.
Step 4: Wire the Opener and Test Safety Sensors
The opener is electrical equipment, and the sensors are a legal safety feature. Safety sensors sit a few inches off the floor on each side of the opening and must face each other and line up. If the beam is blocked or misaligned, the door will not close, or worse, it will close on something in its path.
- Mount sensors at the same height on both sides
- Keep the lenses clean and free of cobwebs
- Run wiring away from sharp edges and moving parts
Step 5: Balance Torsion Springs and Counterbalance the Door
A properly balanced door stays put halfway open. If it drops or rises on its own, the springs are wrong.
Test balance by opening the door halfway and letting go. A balanced door holds its position. A door that slides down needs more spring tension. A door that creeps up has too much.
Signs of Improper Garage Door Installation to Watch For
Most bad installs announce themselves in the first 30 days. The trick is knowing which symptom points to which system, because the sound you hear is rarely coming from the part that is actually wrong.
Day One Noises and What They Actually Mean
| Sound | Where It Comes From | Most Likely Install Error | First Check |
|---|---|---|---|
| Rhythmic grinding, once per roller pass | Roller race or hinge knuckle | Rollers seated at an angle in the track, or hinge plates over-torqued | Run the door by hand and watch each roller; a roller that skips is not riding the track face |
| Sharp pop or bang at the start of travel | Torsion spring coils or cable drum | Spring wound to the wrong number of turns, or cables not seated in the drum groove | Do not touch the springs, note whether the pop happens at the same point every cycle and call a pro |
| Low hum, door does not move | Opener motor or manual lock | Operator arm engaged with the manual lock still in place, or opener force limit set too low | Confirm the lock is disengaged, then check the opener’s travel and force settings against the manual |
| Scraping along one side only | Vertical track or jamb | Track not plumb, or jamb out of square | Hold a 4 ft level against the inside face of the vertical track on the noisy side |
| Rattle that stops when you press the door | Hinge bolts or bottom bracket | Fasteners not snugged to the manufacturer’s torque, or lag screws bottomed in drywall | Check each hinge bolt and the bottom bracket with a socket, not a screwdriver |
| Clicking from the ceiling | Opener rail or trolley | Rail joints not fully seated, or trolley carriage riding dry | Inspect rail splices and lubricate the trolley per the manual |
A single pop at the same point in every cycle is the one sound you should never troubleshoot yourself. That is stored energy releasing through a spring or cable, and it belongs to a trained installer.
Visual and Operational Warning Signs
- Door drifts down when you let go at the halfway point. The counterbalance is wrong. A correctly balanced door holds position within a few inches.
- Door reverses before it touches the floor. The safety sensors are misaligned, dirty, or the opener’s travel limit is set short. Clean the lenses first, then check alignment with a string line across the opening.
- Visible daylight around the perimeter. Weather stripping was cut short, or the door was hung before the opening was squared. Sealing a door that is out of square just hides the real problem.
- Rollers that spin freely but do not roll. Nylon rollers with seized bearings drag instead of roll and will flat-spot the track. Replace them; do not lubricate a seized bearing.
- One side of the door contacts the floor before the other. The horizontal tracks are at different heights, or the cables are uneven. This is a track and cable issue, not a spring issue.
The 30-Day Window
Installation defects surface on a predictable schedule. Track and roller problems show up in the first week, spring and cable issues within the first month as the springs settle, and sensor and opener problems any time the seasons change and the framing moves.
Never put a hand, tool, or winding bar near a torsion spring, cable, or bottom bracket to investigate a noise. Springs and cables hold enough stored energy to cause serious injury. Diagnose from a distance and hand the repair to a trained installer.
Post-Installation Maintenance Schedule
A good install still needs upkeep. Plan a quick check every few months.
- Monthly: Test the safety sensors and the auto-reverse.
- Every 3 months: Lubricate rollers, hinges, and springs.
- Every 6 months: Tighten bolts and check the balance.
- Yearly: Inspect cables, springs, and weather stripping.
DIY vs. Professional Threshold
The line between a weekend project and a call to a pro is not about confidence. It is about stored energy, electrical code, and structural load. Use the matrix below to sort each task before you pick up a tool.
Decision Matrix
| Task | DIY Safe? | Why |
|---|---|---|
| Lubricating rollers, hinges, and springs | Yes | No stored energy released; follow the manual’s lubricant type |
| Tightening hinge and bracket bolts | Yes | Low torque, no load path change |
| Cleaning and realigning safety sensors | Yes | Low voltage, no mechanical load |
| Replacing weather stripping and bottom seal | Yes | Cosmetic and thermal, not structural |
| Replacing a roller (door down, springs relaxed) | Usually | Only if the door is fully down and the springs are not under tension |
| Adjusting opener travel and force limits | Usually | Follow the manual exactly; wrong limits defeat the safety reverse |
| Replacing the opener or running a new circuit | No | Electrical code, dedicated outlet, and permit requirements apply |
| Adjusting or replacing torsion springs | No | Highest stored-energy hazard in the entire system |
| Replacing lift cables | No | Cables are under tension and can whip |
| Realigning tracks after a major shift | No | Track movement usually means the framing or anchors moved too |
| Reinforcing a header or jamb | No | Structural load path; may require a permit and inspection |
Personal Protective Equipment for the Tasks You Can Do
Even DIY-safe tasks have a minimum gear list. For anything involving the door overhead:
- Safety glasses, always, even for lubrication. A drop of oil in the eye ends the project.
- Work gloves, cut-resistant on the cable and spring side, standard on the panel side.
- Non-slip footwear, the floor under a garage door collects oil and dust.
- A ladder rated for your ceiling height, most garage ceilings are 8 to 10 ft, and a step stool is not enough.
The Permit and Inspection Line
Most jurisdictions treat a garage door opener circuit as an electrical modification, which means a dedicated outlet and, in many cases, a permit and inspection. Structural changes to the header or jamb can also trigger a permit. Before you cut into framing or run a new circuit, check with your local building department, a permit costs far less than undoing unpermitted work at resale.
When to Stop and Call a Pro
Stop immediately if any of the following is true:
- The door will not stay in place when you let go at the halfway point.
- You hear a pop, bang, or snap from the spring or cable area.
- A cable is frayed, kinked, or off its drum.
- The track has moved more than a fraction of an inch from plumb.
- The opener runs but the door does not move, and the manual lock is already disengaged.
Each points to stored energy or a structural load path, the two categories where DIY savings are smallest and risk is highest.
Photograph every fastener and bracket before you touch anything. If you do have to call a pro, the photos tell them exactly what was done and save diagnostic time on the invoice.
Frequently Asked Questions
What are the most common garage installation mistakes?
The most frequent errors include incorrect measurements that leave gaps around the door, tracks that are not plumb or level, safety sensors mounted too high or misaligned, and springs that are not properly tensioned. Each of these leads to premature wear on rollers and cables, doors that bind or reverse unexpectedly, and in the worst cases, a door that can fall. Checking alignment, anchoring, and sensor height before the door is operated prevents most of these problems.
How can I tell if my garage door was installed incorrectly?
Watch for a door that shakes or jerks during travel, visible gaps between the door and the frame, a bottom seal that does not touch the floor evenly, or sensors that fail to stop the door when you pass a hand through the beam. Noises like grinding or popping on day one usually point to track misalignment or loose fasteners. If the door reverses for no reason, the sensors or spring tension need attention.
Why is professional installation safer than DIY for garage doors?
Torsion springs store enough energy to cause serious injury if they release unexpectedly. A trained installer also verifies that the anchoring meets load ratings, that the wiring follows local electrical codes, and that the door balances correctly through its full travel. These checks are difficult to replicate without the right tools and experience.
How much does improper installation add to garage door replacement cost?
A door that was installed poorly often needs to be removed and reinstalled, which adds labor on top of the original price. Replacing damaged tracks, rollers, cables, or springs caused by misalignment pushes the total higher still. In some cases the panels themselves are warped from uneven tension and must be replaced. Getting the installation right the first time avoids paying twice for the same project.
A bad garage install costs you time, money, and safety. It also undercuts the curb appeal you were trying to build. Image Doors installs handcrafted carriage house doors with the same care at every step, from measuring the opening to balancing the springs. Our team brings 18 years of experience, custom design options, and professional installation to every project. Get started with Image Doors and get a door that looks right and works right for years.
Recent Comments